Why your price layout matters
Plus, 🧢Easy product mockups for brands

Hello Readers 🥰
Welcome to today's edition, bringing the latest growth stories fresh to your inbox.
If your pal sent this to you, then subscribe to be the savviest marketer in the room😉
The Psychology Behind Price Tags
When it comes to pricing, perception is everything. Shoppers rarely analyze prices logically—they respond to subtle cues that shape how affordable or expensive something feels. That’s why how you present your prices can impact conversions just as much as the actual number.
Here are four quick pricing psychology tricks that help you win more checkouts—backed by behavioral science:
1️⃣ Shrink the Discounted Price: Smaller font = more minor cost in the mind of your shopper. By displaying the sale price in a smaller typeface than the original price, you make it feel cheaper without changing the numbers.
2️⃣ Align Prices Horizontally: Place the original price on the left, and the discounted price on the right, side by side. Since people read from left to right, they naturally compare and absorb the price drop better this way.
3️⃣ Lower the Final Digit: Avoid ending the sale price with a number higher than the original. For example, £295 down to £250 feels cheaper than £295 to £249, even though the latter is technically less. Our brains latch onto the last digit, and lower endings feel like bigger deals.
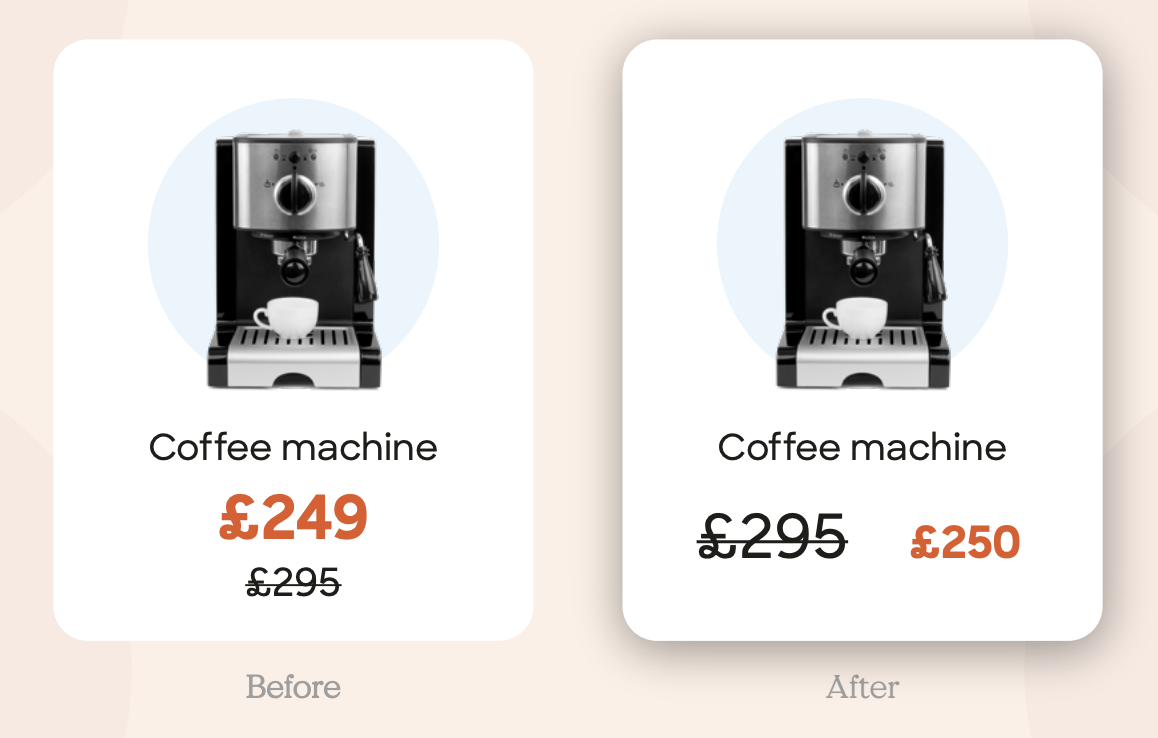
4️⃣ Create Visual Distance: Physically separating the original and discounted prices (with space, lines, or different sections) allows customers to mentally register the savings more clearly—making the deal more persuasive.
The Takeaway
The smallest tweaks to how you display prices can change how people perceive them. Test these tactics in your product pages, pricing tables, and ads to boost conversions—without changing your offers.
🧢 Create Branded Product Mockups in Minutes
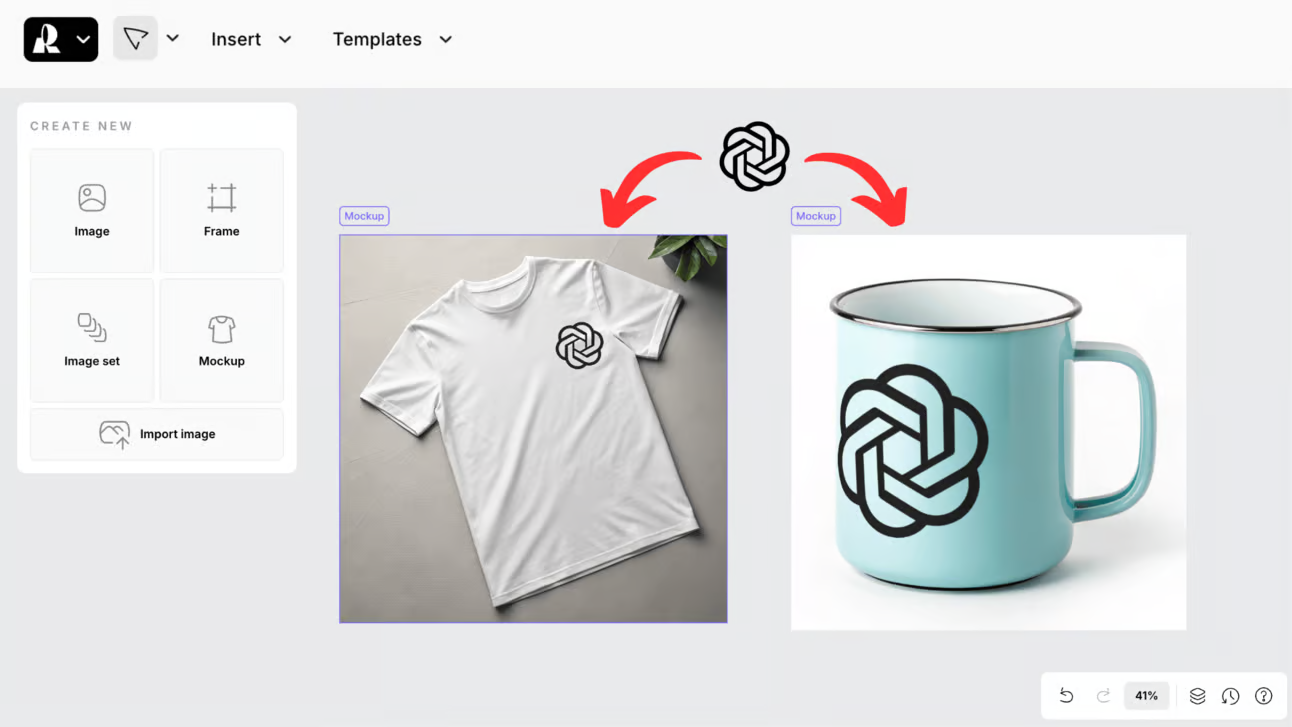
Need polished product visuals without spending hours in Photoshop or hiring a designer? Recraft has your back. With its intuitive mockup tool, you can turn any logo into a professional-looking product image—ready to showcase on your website, pitch deck, or online store.
Here’s a step-by-step walkthrough to get started:
Steps to Design Custom Product Mockups with Recraft:
1️⃣ Sign In to Recraft: Start by signing into your Recraft account. The free tier gives you 50 credits per day—plenty to create mockups for multiple products.
2️⃣ Select a Product Template: On the canvas, click “Product Photo” and choose a base image—like a T-shirt, tote bag, or hoodie. These high-quality templates are designed to simulate real-life textures.
3️⃣ Upload Your Logo: Click “Import Image” to bring your logo into the project. Then, hit “Remove Background” to isolate your logo—making it clean and transparent for a seamless overlay.
4️⃣ Place and Preview: Drag the logo onto the product and watch it automatically conform to fabric folds and lighting. You can adjust placement, scale, or rotate it until it looks just right.
The Takeaway
Recraft simplifies mockup creation for brands and creators alike. You can quickly go from logo to polished visuals without touching design software. Whether you're prepping for launch or updating your store, Recraft makes it easy to showcase your brand with style.
We'd love to hear your feedback on today's issue! Simply reply to this email and share your thoughts on how we can improve our content and format.
Have a great day, and we'll be back again with more such content 😍