Turn Website Headers Into Revenue
🎯 Master Above-the-Fold Design and how to build AI-Powered talking videos

Hello Readers 🥰
Welcome to today's edition, bringing the latest growth stories fresh to your inbox.
If your pal sent this to you, then subscribe to be the savviest marketer in the room😉
In Partnership with Grapevine
The UGC Engine That Quietly Beats Your Ads
Here’s the truth you already know: branded creative looks great in a deck but loses where it matters, performance. CPAs rise, testing drags, and every “pretty” ad feels like a bet you can’t afford.
Grapevine solves that with a done-for-you UGC engine designed to outperform the ads you’re running now quietly. No chasing creators. No contract chaos. No wasted cycles.
Grapevine handles it all. Just authentic content plugged into your paid social flows, and the numbers prove it works.
- Editorial whitelisting campaigns reduced CPAs by up to 40%, unlocking immediate margin gains.
- Nood achieved 4× ROAS while scaling spend, showing UGC can drive growth and efficiency together.
- Benchmarks confirm Grapevine ads outperform branded creative by 25%+ across platforms.
The after-state? Faster launches, cheaper acquisitions, and a UGC pipeline that compounds wins while your team focuses only on scale.
Perfect Your Above-the-Fold Design
The above-the-fold (ATF) section of your website is the most valuable real estate you have; it determines whether visitors stay or bounce. While creativity matters, this is one place where clarity should win over novelty. Your goal is to make your product the most interesting part of your site, not the design itself.
Steps to Build a Winning Above-the-Fold
1️⃣ Nail the Message First:
Your header should clearly communicate value and what customers stand to gain in actionable, specific language. Follow it with a bold hook that handles a key objection. Use your subheader to clarify what your product does or highlight a key feature that reinforces the promise.
2️⃣ Use Visuals That Add Value:
Images should be modern, crisp, and relevant. Show your product in action or highlight its results to reduce uncertainty. If it’s a physical product, display close-ups and use-case shots, ideally in real packaging to boost credibility and recognition.
3️⃣ Embrace Negative Space:
Clean layouts with generous white space help your visuals and copy stand out. It adds sophistication and guides the user’s eyes toward what matters most your message and CTA.
4️⃣ Simplify Navigation:
Limit your navbar to 2–4 core links and a standout CTA. Too many options create friction; too few can feel incomplete. Guide users toward one main action, like “Start Free Trial” or “Book Demo.”
5️⃣ Craft Specific, Action-Oriented CTAs:
Your call-to-action should naturally continue the story started in your header. Instead of vague prompts like “Submit” or “Request Meeting,” use directive phrasing such as “See How It Works” or “Start Learning.”
The Takeaway
Your above-the-fold design isn’t the place to reinvent the wheel. It’s about combining clarity, clean visuals, and strong calls-to-action to lower skepticism and increase conversions. Keep it simple, guide users naturally, and make your product the star.
Create Talking Head Videos with AI
Want to create professional talking head videos without filming? With AI tools, you can generate a realistic speaking avatar that moves and talks using your own voice. This method combines two key tools, one for generating a headshot and another for animating it, allowing you to produce studio-quality videos in minutes.
Steps to Create a Talking Avatar Video
1️⃣ Generate a Professional Headshot:
Start by opening an AI image tool like Gemini. Upload your photo and prompt it to generate a professional headshot, specifying details such as outfit, background, and lighting. For example: “Give me a professional headshot of this person as a talking head, facing the camera, wearing a white shirt, with a neutral office background, close-up shot, and high resolution.”
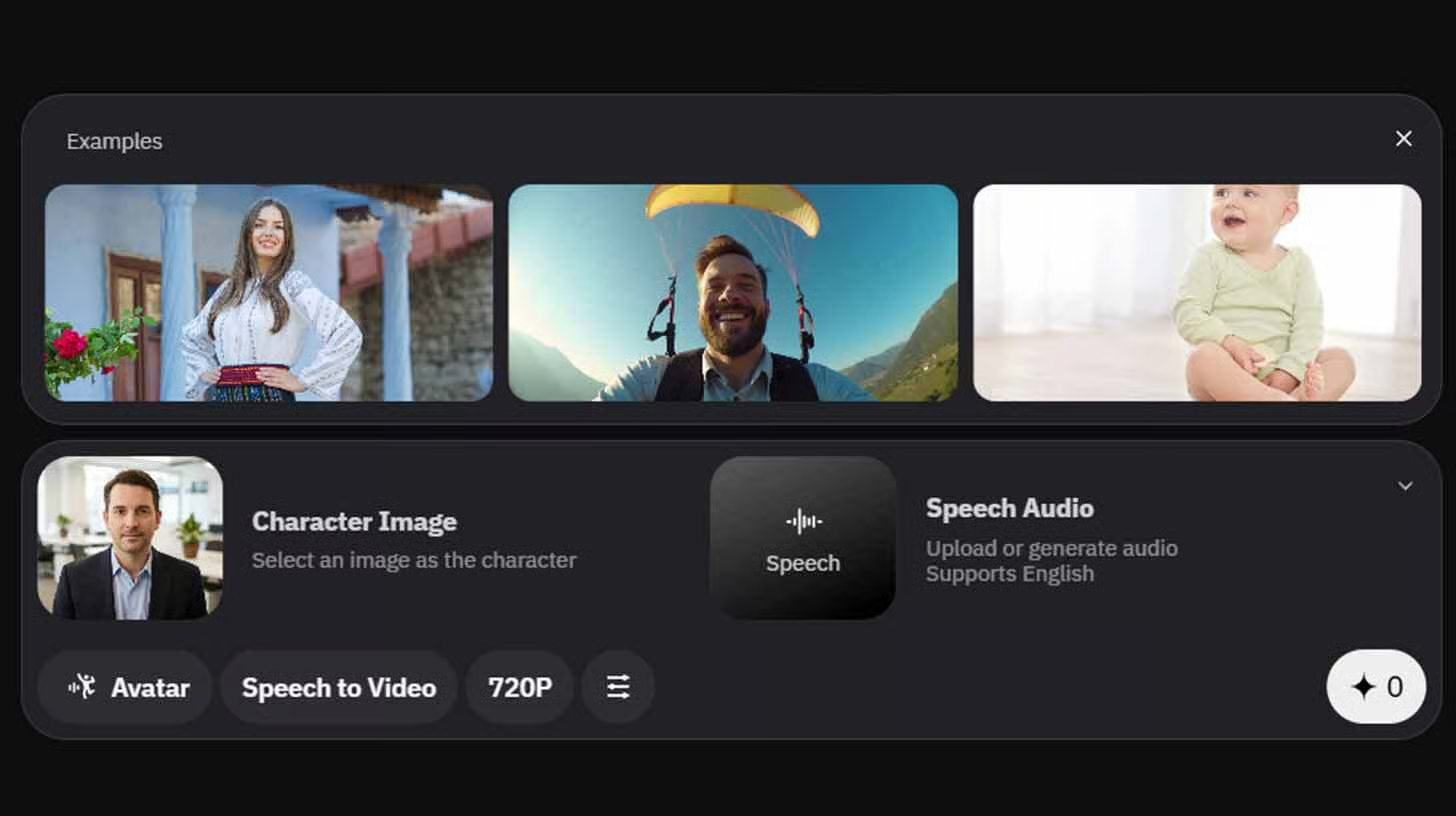
2️⃣ Set Up the Video Project:
Go to your animation platform and create a new project. Change the media type to Avatar mode to begin.
3️⃣ Add Your Audio or Script:
Upload the AI-generated headshot and record your voice for 10–15 seconds. You can also paste a written script (up to 300 words) and use built-in AI voices to generate narration.
4️⃣ Sync Voice and Animation:
Click Generate to synchronize lip movements with your audio. Once the animation is complete, send it to your timeline and use the “+” button to combine clips for longer presentations.
The Takeaway
This workflow helps you create personalized, high-quality video presentations without cameras or editing software. Whether for product demos, tutorials, or social media content, AI talking head videos deliver professional storytelling in record time using just your voice and creativity.
We'd love to hear your feedback on today's issue! Simply reply to this email and share your thoughts on how we can improve our content and format.
Have a great day, and we'll be back again with more such content 😍